Translate

Tuesday, November 24, 2015

Winter Knitting

Good Afternoon!  I hope you are all having a lovely day!  Mine is going well so far.  :-)  I started the hat I mentioned yesterday.  It isn't going to be anything fancy, as I need it right away, since we've already gotten snow.  lol  The yarn I am using is a lovely lace weight Jaggerspun wool in a pearl gray.  Since it is lace weight, I decided to double up the strands, so it is more like working with a DK or a sport weight yarn now.  
 Then it was time to choose a needle size.  I decided on a size 6 (4mm) needle.  After going through my many many sets of circular needles, to my dismay, I realized that I didn't have a 16 inch circular needle, which is the perfect size to knit a hat in the round.  I have 9 inch (perfect for socks or gloves), a 24 inch, and a 32 inch.  At this point, I could either use the 32 inch, and work a magic loop, or use 2 sets of circular needles.  I decided to use 2 sets of circular needles.  I find it more comfortable than the magic loop method.  The one downside to this method, is if one isn't careful, you could end up with gaps, or "ladders".  I do have a couple of tricks to avoid this, and so far it is coming along nicely.  I just make certain that when switching needles, I pull the first 4 or 5 stitches as tightly as possible.  This always does the trick to avoiding those pesky gaps.

I cast on 100 stitches, divided them between my 2 needles, then proceeded to knit a 2 (knit) by 2(purl) ribbing for the band part of the hat, which will be approx. 6 inches, then I will switch to a simple stockinette stitch.  I will keep you posted on how it is coming along.
 
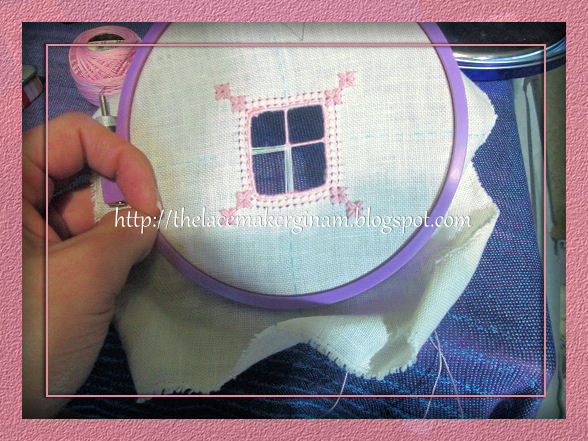
I am also completely finished with the Schwalm Sampler!  It is laundered, ironed and waiting to be framed which will be later today.  Here are some pictures of the finished piece:


I'll also snap a photo to share once it's framed.  It was easier and quicker making it the second time around, of course, and a big part of that is due to the book I have by Luzine Happel.  She explains every little detail about Schwalm, both the how and the why.  This is why I will ordering another book from her shortly.  It's called Fancy Hems, and it has all sorts of. . . you got it, Fancy Hems. lol  I imagine that the techniques and patterns she has in that book would just add infinite more beauty and intricacy to any type of embroidery, not just Schwalm.
 
I could probably write three more paragraphs about how fantastic Luzine Happel's books are, but my hands are itching to get back to my hat.  This week is Thanksgiving, and starting tomorrow afternoon, I will pretty much be glued to the kitchen.  lol  Tomorrow, I bake all the pies and deserts, and early. . . veeeeeerrrrry early Thursday morning, I start cooking the turkey and all the trimmings, so I have to use the time I have left to get as much of it done as I can.  I hope you all have a wonderful day and. . . 
'Til Tomorrow
Happy Stitches!
 

Monday, November 23, 2015

Winter Wonderland Weekend

I hope you all had a wonderful weekend!  Mine was pretty good. . . we did get a few inches of snow this weekend.  When Winter comes, I always get into a knitting kind of mood.  I went through my yarn stash, and found a beautiful pearl gray wool that I had purchased from Halycon Yarns last winter.  I decided to turn this beautiful wool into a slouch hat.  I have a basic pattern in my head, and I just know it will keep my ears toasty warm.  I will keep you posted as I get this project started.

I also finished the little Reticello piece.  After I stitched the square stitches and the bullion stitches, it was time to do some drawn thread work.  To secure the linen after withdrawing the threads, I stitched an overcast stitch over one guide thread.


The edging could have been neater in my opinion, but it wasn't completely horrible for a practice piece.  Next it was time to work the buttonhole stitches.  This part was pretty simple for me, as it was just needle lace technique.


After the buttonhole flower, it was time to add some satin stitches.  Casa Erba provides a graph pattern which made it easy to stitch the design.


I withdraw some more threads, and hemstitched them into groups of four.


The last part of the tutorial was to add an alternating stem stitch around the square, which I did.  I also added some buttonhole stitches. . . I think I will add a needle lace edging to this in the future. I can't wait to do more of this technique, which is why I gave in and ordered a Reticello book from Lacis over the weekend.  lol  I would like to give a big thank you to Casa Erba for providing this tutorial and pattern.


I also did some work on the Schwalm Sampler. . . I finished it, and have it soaking right now.  After it is laundered, I will use the sewing machine to secure the edges and will finally be able to frame it.


Well, it's about time to work on that hat. . . Michigan winters are very cold, so the sooner I get started, the sooner I will have a toasty warm head!  I hope you all have a wonderful day!

'Til Tomorrow
Happy Stitches!

Friday, November 20, 2015

Reticello Piece

Yesterday I started the little reticello piece by Casa Erba.  I am really enjoying this technique.  It is very similar to Ruskin Lace, but I think it is prettier and more delicate looking.  To start, I chose a linen.  The tutorial calls for a 38 count, but I only had a 36 or 40 count.  I went with a 36 count Edinburgh by Zwiegart in Cream. 


I cut a square of linen approx. 7.5 inches by 7.5 inches, and then zigzag stitched the edges to prevent fraying. 


 I also added basting stitches to mark the horizontal and vertical centers of the linen.  The tutorial doesn't instruct it, but it's become a habit, and basting did help me when it came time to withdraw threads.

To baste, first I folded the linen in half one way, and then the other.  I threaded my needle with a bright colored thread, and stuck the needle through the center hole.  I left a long tail so that I could use this end to stitch the other direction.


Then it was time for the fun stuff!  The tutorial also called for Pearl Cotton in sizes 8 and 12.  I picked a pretty rose pink by DMC.  I also gathered an embroidery hoop, a size 26 tapestry needle, size 8 embroidery needle, pins ( to help count threads), embroidery scissors and a milliner's needle (for the bullion stitches.)


The tutorial starts with a Punto Quadro stitch (also known as a square stitch or 4 sided stitch)  There are gif demonstrations that the tutorial uses to show how the stitch is executed.  At the corners of the square motif, there are groupings of 4 square stitches that are also demonstrated by gif demonstration.  After having to wait for it to loop around a few times to be able to follow it, I finally had the great idea to just screen shot the steps so I could follow it at my own pace. . . I wish I had done that from the beginning as it would have saved me 20 minutes.  lol


There are also Bullion stitches that cover the corner square stitches.  They are very pretty and remind me of little pink blossoms.


It's a great tutorial that I am really enjoying it.  I am definitely going to be buying some Reticello books in the near future.  :-)  

Well, it's about time to make dinner.  I hope you all enjoyed your day. . .

'Til Tomorrow
Happy Stitches!  

Thursday, November 19, 2015

Pins and Roses. . .

My little pincushion is finished, and doing it's job. . . holding pins.  :-)  After I finished stitching the rose, I measured the finished piece and decided on the dimensions, leaving about a centimeter all around for seams.  For the back of the pillow, I just used two pieces of Southern Belle cotton muslin.


 The front already had a piece of cotton attached to it, because I used it as a backing for the embroidery.  After cutting all the material, I stitched the pieces together using a running stitch on the sewing machine.  Then I laid the two pieces of the pillow together, right sides facing each other.  I sewed three of the four sides completely together using a zigzag stitch.  I sewed the two ends of the fourth side together, leaving an opening about 2 inches to be able to stuff the pillow, and when I was done, turned the pillow right side out.


I just used some craft fiberfill to stuff the pillow.  .  . last year I made all new decorations for our Christmas tree, so I had plenty of stuffing left.  After it was filled to my satisfaction, I hand sewed the opening closed, using a slip stitch (or aka blind stitch), and I was done!  I do wish I had used a blanket stitch on the edges of the pillow to add a bit more color, but all in all, I am very happy with my little Rose pincushion.


I have a couple of little flowers that I had stitched, when I first purchased Trish Burr's book.  I think I will make a couple of more pincushions out of them with my daughters.  It's Thanksgiving here next Thursday, and they only have to attend school 2 days next week, so I think it will be a good holiday craft project for the three of us.  Then we can each have our own little pillows.

Since I completed my pincushion yesterday, I spent a little time working on the Schwalm Sampler.  I have the last motif outlined and here is a quick pic of the little pigeon:


Cute little guy, huh?

For my next project, I am going to make a little reticello piece.  There are a few books I have been thinking of purchasing that teach this lovely Italian Embroidered Lace, but with Christmas so close, it will probably be a couple of more months before I can get any goodies.  However, I did find a free pattern and tutorial online in this technique.  I have a little bit of experience with Ruskin Lace, and more than a little bit of experience with needle lace, so I think I will be able to follow the pattern.  If you're interested in joining me, you can find the free pattern and tutorial at Casa Erba.  I'll be sure to keep you posted on this project.

Today, I am going to spend the rest of the day working on the netting of the Irish Crochet Capelet.  What are you working on today?  Whatever it may be, I hope you have a lovely afternoon. . .

'Til Tomorrow
Happy Stitches! 

Wednesday, November 18, 2015

Rose is Finished!

Good Afternoon!  The Burgundy Rose has been completed, and the little pincushion is almost done!  I am very pleased with how the Rose turned out, and the colors are gorgeous.  It was a little challenging stitching the last petal. . . it used the same colors as the petal next to it, and if one isn't careful, it could have ended up looking like one big petal, instead of two separate ones


I tried to "stagger" the colors on the last petal, and I also added a few straight stitches along the edge, to help distinguish the two separate parts of the flowers, and here is the end result:


I love Trish Burr's needle painting book, and I can't wait to stitch more of the projects from the book.  It is very informative and inspirational, however, if I hadn't completed Mary Corbet's Long and Short stitch project and tutorials, I doubt this little Rose would have turned out as well as it did. :-)

I worked on constructing the pincushion this morning.  The only thing left to do is to stuff it, and sew the last edge together.  I'll share these photos tomorrow.  I'm debating on whether starting another needle painting project, or perhaps some Aemelia Ars. . . it's been awhile since I made some needle lace. 

 I also had another idea for beaded crochet jewelry.  I was thinking of making a choker/collar this time with Swarvoski pearls.  I have a basic idea in my head.  Maybe I'll host a crochet a long to go with the piece.  Write down what I'm doing and give tutorials on the blog so those who want to follow along, can.  Plus, this helps me as well. . . if I ever want to recreate the piece, the pattern will be written down.  lol  Let me know what you all think, and enough people want to, then we can get started soon.

Alas, my Schwalm Sampler is calling to me. . . I am so close to finishing it.  :-)  But before I go, just a quick reminder that the Blog Giveaway for the silk bracelet is open for entry here.  I really hope this beauty finds the owner it was meant for.  :-)

'Til Tomorrow
Happy Stitches!